Supabase Astro blog on Cloudflare: one guide from database to deploy
Four layers share one Postgres database, and each has a single place where it breaks quietly. Here is how to build every layer from the current docs, and how to spot those breaks before your editors do.
What does a Supabase Astro blog need in 2026?#
A Supabase Astro blog keeps posts in Supabase Postgres behind row level security, renders them with Astro on Cloudflare Workers, and edits them in a react-admin panel. Each tool does one job. Supabase is a hosted Postgres database with login, file storage and an API on top. Then Astro is a web framework that turns content into fast HTML pages. Finally, react-admin is a React toolkit for admin screens, and ra-supabase connects it to Supabase.
In short, the stack has four layers:
- The database. Tables for posts and profiles, grants that let the API see them, and policies that decide which rows each person gets.
- The frontend. Astro pages that read published posts, either at build time or per request.
- The admin. A react-admin panel where editors log in and write, held to the same policies.
- The deploy. The Astro site on Cloudflare Workers through the official adapter.
Each layer has one place where it breaks without much noise. So the next eight answers take the layers in build order, and you can jump to the one you need.
What does a content team gain from this stack?#
One Postgres database holds posts, authors and permissions for the site and the admin alike, and Workers Free serves up to 20,000 static files per Worker version. As a result, the public site, the editor screens and the login all read one source of truth. And a rule written once in the database holds everywhere, because no layer keeps its own copy of who may do what.
The free tier also covers a real blog. Cloudflare's limits page, updated 5 September 2026, caps static files at 20,000 per Worker version on Workers Free and 100,000 on Workers Paid.
For example, take an illustrative blog of 1,500 prerendered posts, each with one HTML page and 8 image files. In that example the build holds 13,500 files, so it fits the free cap. But at an illustrative 2,500 posts the same site ships 22,500 files. Then it needs the paid plan, or it renders older posts on demand instead. Later, the deploy answer turns this into a calculator you can change.
20,000
Workers Free
100,000
Workers Paid
Workers Free holds 20,000 static files per Worker version, which covers the 13,500 files of the illustrative 1,500 post blog.
| Option | static asset files per Worker version |
|---|---|
| Workers Free | 20,000 |
| Workers Paid | 100,000 |
Source: Cloudflare, Workers limits, updated 5 September 2026
Astro vs Supabase: which one does what in a blog?#
Astro is the frontend framework that renders your pages, and Supabase is the backend that stores posts, users and files in Postgres, so a blog uses both rather than choosing one. The search for Astro vs Supabase, or Supabase vs Astro, usually comes from seeing both names in one tutorial. Yet they sit on different sides of the same request.
Astro's own Supabase guide describes the backend plainly: "Supabase is an open source Firebase alternative." It then lists what you get, which is a Postgres database, authentication, edge functions, realtime and storage. But Astro brings none of that. Instead, it builds pages, and Cloudflare's Astro guide shows how those pages ship to Workers.
So an Astro Supabase project meets at one point: a call to the Supabase client inside an Astro page. First the page asks for rows, then Postgres checks the policies, and Astro turns the rows it gets back into HTML. Meanwhile, the Supabase docs built with Astro in mind, the Astro quickstart, show that same call in a few lines.
How do you set up the Supabase database, grants and triggers for a blog?#
Create posts and profiles tables, then grant the anon and authenticated roles access, because from 30 October 2026 new public tables stay invisible to the Data API until granted. Supabase set out the change in its changelog of 28 April 2026. On 30 May 2026 it began rolling out as the default for new projects, and every existing project gets it on 30 October.
The changelog puts the reason in one line: "Grants are a separate layer: they control whether a role can access a table at all, while RLS controls which rows that role can see." Still, tables you already have keep their grants. But a new table without a grant fails before any policy runs. When that happens, PostgREST returns an error with the exact grant to add, so read the hint before you debug a policy.
Here is a posts table in that order: table, grants, then a trigger that keeps the edit time current.
create table public.posts (
  id bigint generated always as identity primary key,
  author_id uuid not null references auth.users (id),
  title text not null,
  slug text not null unique,
  body text,
  published boolean not null default false,
  updated_at timestamptz not null default now()
);

grant select on table public.posts to anon, authenticated;
grant insert, update, delete on table public.posts to authenticated;

create function public.set_updated_at()
returns trigger
language plpgsql
as $$
begin
  new.updated_at = now();
  return new;
end;
$$;

create trigger posts_set_updated_at
before update on public.posts
for each row
execute function public.set_updated_at();
A trigger is two parts on Supabase's triggers page: a function that returns trigger, and the trigger that calls it. Also, the same pattern fills a profiles row when someone signs up. For functions, Supabase's database functions page says to prefer security invoker, the default. If you do use security definer, you must set the search path.
So how big can the database grow? Supabase's compute page gives a recommended maximum size for each compute size, and even the smallest paid one leaves a text blog ample room.
Show data table
| Item | Value |
|---|---|
| Micro | 10 GB |
| Small | 50 GB |
| Medium | 100 GB |
| Large | 200 GB |
Even the smallest size in the chart, Micro, is recommended for up to 10 GB, which leaves a text blog ample room.
Then connect from code with supabase-js, version 2.117.2 on npm as of 25 September 2026.
How do Supabase row level security policies protect a blog?#
Row level security makes Postgres check a policy on every row, so with RLS on and no policy the publishable key reads nothing, and each policy opens one operation to one role. Supabase's RLS page says it directly: "no data is accessible through the API when using a publishable key, until you create policies." In practice, that empty result is the first thing most people meet with Supabase row level security.
So a blog needs one policy per operation. Anyone may read published posts, and only the author may insert, update or delete their own. Here is the owner rule for updates, in the form the RLS page uses:
create policy "Authors can update their own posts"
on public.posts for update
to authenticated
using ( (select auth.uid()) = author_id )
with check ( (select auth.uid()) = author_id );
using checks the row as it is now, and with check checks the row after the change. Also, insert and delete follow the same shape. As a result, an author cannot move a post to someone else by editing author_id.
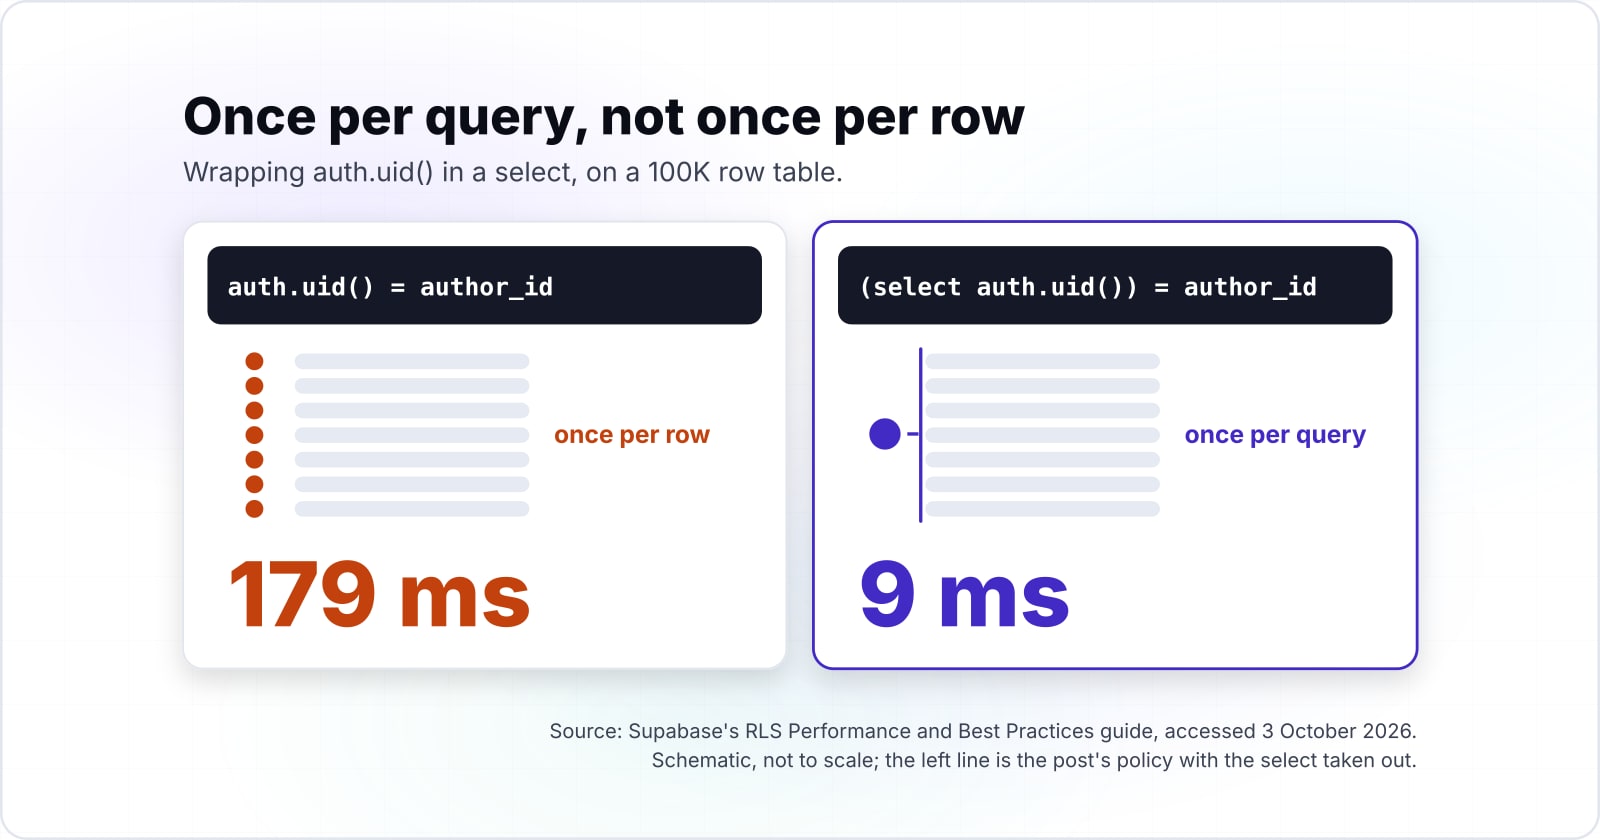
Notice the select around auth.uid(). Because of that wrapper, Postgres runs the function once per query, not once per row. In particular, Supabase's RLS performance guide tested it on a 100K row table.
| Fix in Supabase's test | Before (ms) | After (ms) |
|---|---|---|
| auth.uid() wrapped in a select (test 2a) | 179 | 9 |
| is_admin() join wrapped in a select (test 2b) | 11000 | 7 |
| is_admin() OR auth.uid() wrapped (test 2c) | 11000 | 10 |
| has_role() wrapped in a select (test 2d) | 178000 | 12 |
| user_teams() as an array select (test 2e) | 173000 | 16 |
| filter added in the query (test 3) | 171 | 9 |
| join reversed onto auth.uid() (test 5) | 9000 | 20 |
The pattern is clear. In short, wrapping the call, adding the filter to the query too, and indexing the column the policy reads all move a slow policy to a fast one. For instance, in Supabase's guide the has_role() case fell from 178,000 ms to 12 ms. And while a blog's own policy is simpler, the habit costs nothing.
How do you build the admin with react-admin and CustomRoutes noLayout?#
ra-supabase gives react-admin a Supabase data provider and auth provider, and its forgot and set password pages go inside CustomRoutes noLayout so they render without the admin menu. Editors then work on the same tables, under the same policies, as the public site. So the admin is only as safe as those policies, since it calls the same API with the same key.
The setup has three parts, all from the ra-supabase README:
supabaseDataProviderturns react-admin's list, edit and create calls into Supabase queries.supabaseAuthProviderhandles login and sessions with Supabase Auth.ForgotPasswordPageandSetPasswordPagecover the reset email and the new password screen.
Those last two pages explain the search for react-admin CustomRoutes noLayout. Because a reset link opens for someone who is not logged in, that screen should not show the admin menu. The react-admin CustomRoutes docs give the rule: "If you want a custom route to render without the layout, e.g. for registration screens, then provide the noLayout prop on the <CustomRoutes> element."
Also, the README wraps the admin in a BrowserRouter, because Supabase email links need it. Next, the versions on npm in late September 2026 are react-admin 5.15.4 and ra-supabase 3.5.2. As for hosting the admin: Cloudflare can serve its build as static files next to the site, since every rule lives in Postgres and not in the admin.
How does Astro render posts from Supabase?#
Astro calls supabase-js in the page frontmatter, at build time for prerendered posts or per request on Workers for on-demand pages, with the publishable key that row level security limits. Both paths read through the same client and the same policies. So the only choice is when the read happens.
Prerendering suits posts that rarely change. Once built, the page is served as a file and costs Supabase nothing per visit. However, a new post appears only after the next build. Instead, on-demand rendering suits pages that must be fresh, such as a drafts preview or a search page. In Astro you mark those with export const prerender = false, as the Cloudflare adapter docs show.
Login needs the server. For signed-in pages, Supabase's server-side client guide uses the @supabase/ssr package, which keeps the session in cookies. Then the Supabase Auth quickstart for Astro wires that in with createServerClient and parseCookieHeader. Also note the keys: Supabase's API keys page says Supabase is deprecating the anon and service_role keys by the end of 2026. So use the publishable key in new code, even where an older guide still says anon.
Which official docs should you build each layer from?#
Build from six official pages in order: the Supabase Astro quickstart, row level security, triggers, the ra-supabase README, the Astro Cloudflare adapter and the Cloudflare Workers Astro guide. Because older tutorials predate both the grants change and the Workers adapter, these pages are safer than any copy of them.
- Supabase Astro quickstart: the client file and the two environment variables.
- Row level security: turning RLS on and writing each policy.
- Triggers: the trigger function and the trigger that runs it.
- ra-supabase README: the two providers and the password pages under
CustomRoutes noLayout. - Astro Cloudflare adapter: the adapter, Worker variables and on-demand pages.
- Cloudflare Workers Astro guide: creating and deploying the project with Wrangler.
On npm as of late September 2026, the current versions are astro 7.3.5, @astrojs/cloudflare 14.3.3, @supabase/supabase-js 2.117.2, react-admin 5.15.4 and ra-supabase 3.5.2.
What is the smallest working code for each layer?#
Four snippets carry the whole stack: one Supabase client file, one policy in SQL, one Astro page that lists published posts, and one react-admin App with CustomRoutes noLayout. Each comes from the official docs above, trimmed to what a blog needs. Once pasted in, they run on a laptop against a Supabase project before any deploy.
First, the client file from the Supabase quickstart. It reads the URL and publishable key from .env:
// src/lib/supabase.ts
import { createClient } from '@supabase/supabase-js'

const supabaseUrl = import.meta.env.PUBLIC_SUPABASE_URL
const supabasePublishableKey = import.meta.env.PUBLIC_SUPABASE_PUBLISHABLE_KEY

export function createServerClient() {
  return createClient(supabaseUrl, supabasePublishableKey)
}
Second, turn RLS on and let anyone read published posts:
alter table public.posts enable row level security;

create policy "Anyone can read published posts"
on public.posts for select
to anon, authenticated
using ( published = true );
Third, an Astro page that lists them. The .eq filter repeats the policy on purpose, since Supabase's guide found a filter in the query speeds up the policy check:
---
// src/pages/posts.astro
import { createServerClient } from '../lib/supabase'

const supabase = createServerClient()
const { data: posts, error } = await supabase
  .from('posts')
  .select('title, slug')
  .eq('published', true)
  .order('updated_at', { ascending: false })
---
<ul>
  {error
    ? <li>Could not load posts: {error.message}</li>
    : posts.map((post) => <li><a href={`/blog/${post.slug}/`}>{post.title}</a></li>)}
</ul>
Fourth, the admin, cut down from the ra-supabase README to one resource:
import { Admin, Resource, CustomRoutes } from 'react-admin'
import { BrowserRouter, Route } from 'react-router-dom'
import { createClient } from '@supabase/supabase-js'
import {
  EditGuesser,
  ForgotPasswordPage,
  ListGuesser,
  LoginPage,
  SetPasswordPage,
  supabaseAuthProvider,
  supabaseDataProvider,
} from 'ra-supabase'

const instanceUrl = 'https://your-project.supabase.co'
const apiKey = 'your-publishable-key'
const supabaseClient = createClient(instanceUrl, apiKey)
const dataProvider = supabaseDataProvider({ instanceUrl, apiKey, supabaseClient })
const authProvider = supabaseAuthProvider(supabaseClient, {})

export const App = () => (
  <BrowserRouter>
    <Admin dataProvider={dataProvider} authProvider={authProvider} loginPage={LoginPage}>
      <Resource name="posts" list={ListGuesser} edit={EditGuesser} />
      <CustomRoutes noLayout>
        <Route path={SetPasswordPage.path} element={<SetPasswordPage />} />
        <Route path={ForgotPasswordPage.path} element={<ForgotPasswordPage />} />
      </CustomRoutes>
    </Admin>
  </BrowserRouter>
)
How do you deploy the Astro site to Cloudflare Workers?#
Run astro add cloudflare, set the Supabase URL and publishable key as Worker variables, and deploy with wrangler; Workers Free allows 20,000 static files per version, Workers Paid 100,000.
The Astro Cloudflare adapter docs are blunt about the target: "The Astro Cloudflare adapter no longer supports deployment on Cloudflare Pages." So the steps are:
- Run
npx astro add cloudflare. It installs @astrojs/cloudflare 14.3.3, whose npm entry lists the peer ranges astro ^7.2.0 and wrangler ^4.125.0. - Put the Supabase URL and publishable key under
varsinwrangler.jsonc. On-demand pages read them throughimport { env } from 'cloudflare:workers'. Prerendered pages read thePUBLIC_values from.envat build time. - Build and ship with
npx astro build && npx wrangler deploy, the command Astro's Cloudflare deploy guide gives.
Still, the decision that bites a blog is the file count. Because every prerendered post adds its HTML page plus its images to the static assets, the count grows fast. Cloudflare's limits page, updated 5 September 2026, caps that per Worker version.
Static files your blog ships to Workers
Set how many posts you prerender and how many image files each one carries; it counts the static files against both Workers caps.
Static files in the build
13,500
- Files left under the Workers Free cap (negative means over)
- 6,500
- Most posts that fit Workers Free
- 2,222
- Most posts that fit Workers Paid
- 11,111
An illustrative model of the worked example above; caps from Cloudflare's Workers limits page, updated 5 September 2026.
When the count gets close, you have two levers. First, move older posts to on-demand rendering, so they become one route instead of thousands of files. Second, keep images in Supabase Storage rather than in the build.
When is this stack the wrong tool for a blog?#
Choose a hosted headless CMS when editors need drafts, previews and roles on day one, and leave Workers Free when one page makes more than 50 subrequests, its per-request cap. Because this stack is a kit, it is the wrong choice in three cases.
First, editors who need a finished writing tool. Since react-admin gives you forms over tables, not scheduled publishing, previews or review steps, a hosted CMS fits better. It has those built in, and our headless CMS guide compares the options.
Second, pages that fan out. Cloudflare's limits page, updated 5 September 2026, counts every fetch a Worker makes as a subrequest.
50
Workers Free
10,000
Workers Paid
A page on Workers Free may make 50 subrequests, so one Supabase call per related post runs out fast.
| Option | subrequests per request |
|---|---|
| Workers Free | 50 |
| Workers Paid | 10,000 |
Source: Cloudflare, Workers limits, updated 5 September 2026
So a page that calls Supabase once per related post can hit the Free cap of 50 fast. Instead, fetch in one query, or move to Workers Paid.
Third, a team with no one to own SQL. Every rule here lives in policies, and a missing one either hides data or exposes it. Supabase's RLS page warns that a read policy of using ( true ) opens every row to anyone who is signed out. If no one will review policies, pick a CMS that keeps permissions in its own screens.
Where should you go next?#
Read how rendering choices work on Workers, when a headless CMS beats a hand-built admin, and what belongs at the edge before a Worker calls a Postgres region. Each is the next decision after this build.
- Rendering React and Astro pages on Cloudflare covers prerender, server rendering and the edge in more depth.
- The headless CMS guide helps if react-admin seems too bare for your editors.
- What belongs at the edge explains why a Worker that calls one Postgres region still pays a round trip.
- Building an SEO-friendly frontend lists what prerendered pages should carry for search.
If you want a team to run the Workers side, our Cloudflare development team does that work, and our headless CMS team builds editor tools. But the six official pages above are enough to build a Supabase Astro blog on your own.