How to build a Supabase admin interface with Astro, React, and Tailwind
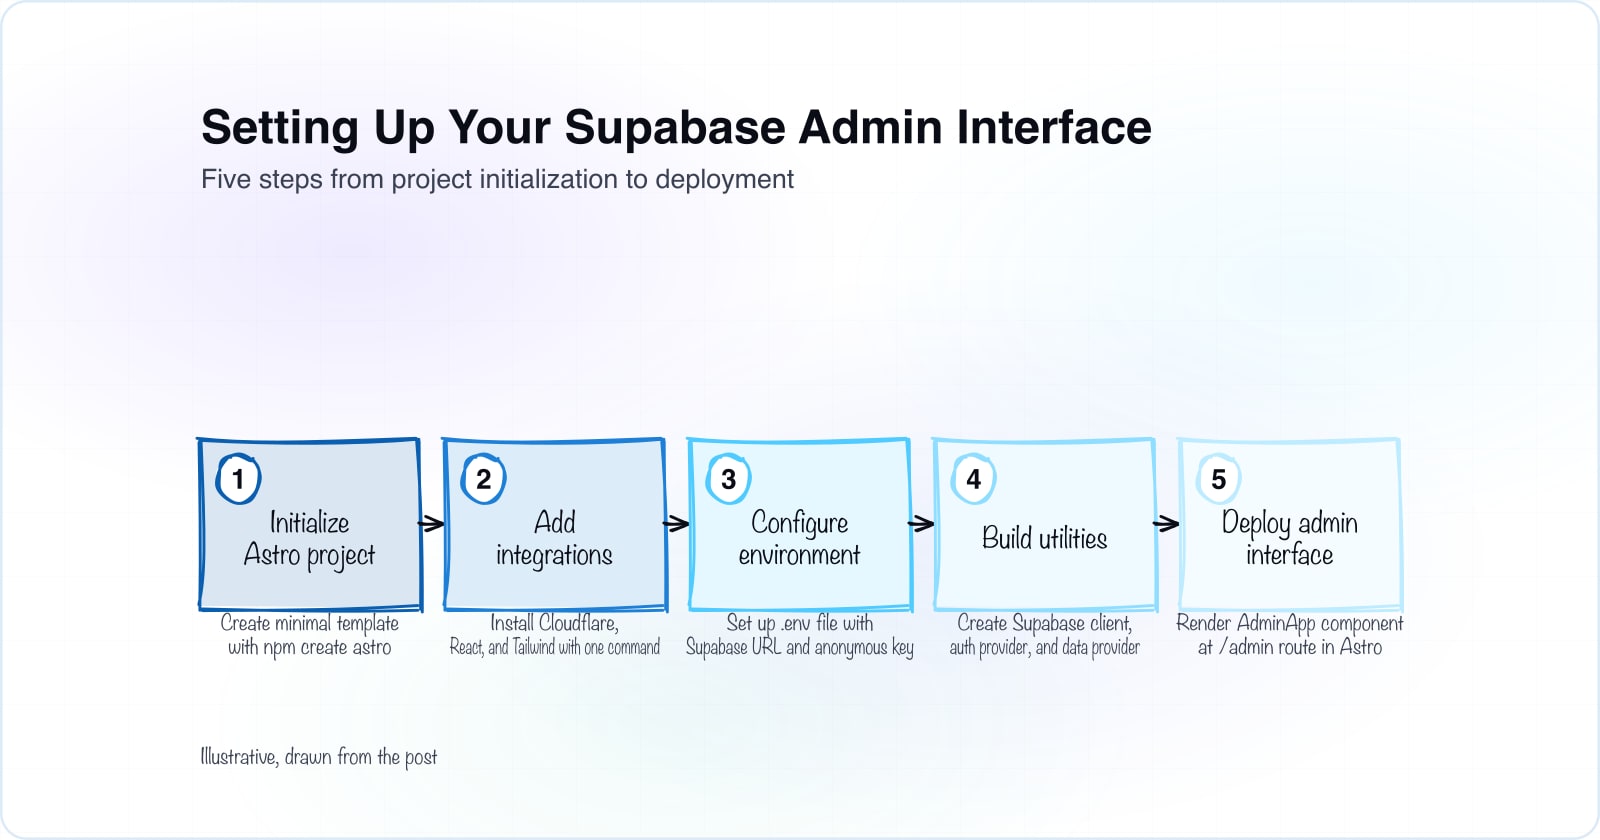
Welcome to Part 3 of our blog-building series. Now that you've laid down a solid foundation with Supabase and locked it down with functions, triggers, and RLS, it's time to bring it all together by setting up a Supabase admin interface. This is where you'll manage your content, handle uploads, and control the entire blog from a user-friendly dashboard. We'll be using Astro, React, and Tailwind CSS to create a sleek, modern admin panel that connects seamlessly with Supabase.
1. Setting Up the Project with Astro and React#
Let's kick things off by setting up your Astro project and integrating it with React, Tailwind, and Cloudflare.
Initializing the Astro Project#
Start by creating a new Astro project:
npm create astro@latestFollow the prompts to set up your project. Choose the minimal template to keep things clean and focused on your admin needs.
Adding React, Tailwind, and Cloudflare Integration#
Next, add React, Tailwind CSS, and Cloudflare Workers support to your Astro project:
npx astro add cloudflare react tailwindThis command will scaffold out the necessary configuration files and dependencies to get React, Tailwind, and Cloudflare up and running with Astro.
Installing Necessary Dependencies#
Now, install the remaining dependencies you'll need for building your admin interface:
npm i @supabase/supabase-js ra-input-rich-text ra-supabase react-admin tailwindcssThese packages will allow you to build rich text editors, manage Supabase integration, and create a responsive admin interface using React Admin.
2. Configuring Environment Variables#
Supabase relies on environment variables for connecting to your project. Let's set those up correctly.
Updating the src/.env.d.ts File#
Create or update the src/.env.d.ts file with the following content to define the types for your environment variables:
/// <reference path="../.astro/types.d.ts" />

interface ImportMetaEnv {
  readonly PUBLIC_SUPABASE_URL: string;
  readonly PUBLIC_SUPABASE_ANON_KEY: string;
}

interface ImportMeta {
  readonly env: ImportMetaEnv;
}
This ensures TypeScript knows what environment variables to expect and provides autocomplete support.
Creating the .env File#
Next, create a .env file at the root of your project:
PUBLIC_SUPABASE_URL="<YOUR_SUPABASE_URL>"
PUBLIC_SUPABASE_ANON_KEY="<YOUR_SUPABASE_ANON_KEY>"
Replace the placeholders with your actual Supabase URL and anonymous key. This file will keep your sensitive keys out of your source code and provide a consistent way to access them across your app.
3. Creating Supabase Utilities#
To make working with Supabase easier, you'll create utility files for the Supabase client, authentication, and data provider.
Supabase Client Setup#
Create src/utils/supabase.ts to initialize the Supabase client:
import { createClient } from '@supabase/supabase-js';

export const supabaseClient = createClient(
  import.meta.env.PUBLIC_SUPABASE_URL,
  import.meta.env.PUBLIC_SUPABASE_ANON_KEY
);
This file sets up the Supabase client using the environment variables you configured earlier.
Auth Provider#
Next, create src/utils/authProvider.ts to handle authentication with Supabase:
import { supabaseAuthProvider } from 'ra-supabase';
import { supabaseClient } from './supabase';

export const authProvider = supabaseAuthProvider(supabaseClient, {
  getIdentity: async (user) => {
    const { data, error } = await supabaseClient
      .from('userprofile')
      .select('id, user_id, name')
      .match({ email: user.email })
      .single();

    if (!data || error) {
      throw new Error();
    }

    return {
      id: data.user_id,
      fullName: data.name,
    };
  },
});
This provider will manage user authentication and link it to your UserProfile table in Supabase, ensuring that only authenticated users can access your admin panel.
Data Provider#
Finally, create src/utils/dataProvider.ts to connect React Admin with Supabase:
import { supabaseDataProvider } from 'ra-supabase';
import { supabaseClient } from './supabase';

export const dataProvider = supabaseDataProvider({
  instanceUrl: import.meta.env.PUBLIC_SUPABASE_URL,
  apiKey: import.meta.env.PUBLIC_SUPABASE_ANON_KEY,
  supabaseClient,
});
The data provider handles all CRUD operations, connecting your React Admin components directly to Supabase.
4. Building the Admin Interface#
Now that your backend is ready, it's time to build the admin interface itself.
Creating the Admin App#
Set up the main admin application. Create src/components/Admin/AdminApp.tsx:
import { Admin, CustomRoutes, Resource } from "react-admin";
import { Route } from 'react-router-dom';
import { LoginPage, SetPasswordPage, ForgotPasswordPage } from "ra-supabase";
import { authProvider } from "../../utils/authProvider";
import { dataProvider } from "../../utils/dataProvider";
import { PostCreate } from "./Post/PostCreate";
import { PostEdit } from "./Post/PostEdit";
import { PostList } from "./Post/PostList";

const AdminApp = () => (
  <Admin
    dataProvider={dataProvider}
    authProvider={authProvider}
    loginPage={LoginPage}
  >
    <CustomRoutes noLayout>
      <Route path={SetPasswordPage.path} element={<SetPasswordPage />} />
      <Route path={ForgotPasswordPage.path} element={<ForgotPasswordPage />} />
    </CustomRoutes>
    <Resource
      name="posts"
      list={PostList}
      edit={PostEdit}
      create={PostCreate}
      recordRepresentation="title"
    />
  </Admin>
);

export default AdminApp;
This component sets up the main admin interface, handling login, password resets, and CRUD operations for posts. It wraps everything in the Admin component from React Admin, which manages the UI and routing.
Setting Up the Post Create and Edit Forms#
Create and edit forms allow you to manage blog posts. First, create src/components/Admin/Post/PostCreate.tsx:
import {
  Create,
  SimpleForm,
  TextInput,
  DateInput,
  required,
  ImageInput,
  ImageField,
  useNotify,
  useRedirect,
  useDataProvider,
} from 'react-admin';
import { RichTextInput } from 'ra-input-rich-text';
import { supabaseClient } from '../../../utils/supabase';

export const PostCreate = () => {
  const notify = useNotify();
  const redirect = useRedirect();
  const dataProvider = useDataProvider();

  const handleSave = async (values: any) => {
    try {
      let updatedFeaturedImages = values.featured_images || [];

      if (!Array.isArray(updatedFeaturedImages) && updatedFeaturedImages.rawFile) {
        updatedFeaturedImages = [updatedFeaturedImages];
      }

      if (updatedFeaturedImages.length > 0) {
        const uploadedImages = [];

        for (const image of updatedFeaturedImages) {
          if (image.rawFile) {
            const file = image.rawFile;
            const fileName = \`\${file.name}-\${Date.now()}\`;
            const { data, error } = await supabaseClient
              .storage
              .from('media')
              .upload(\`public/\${fileName}\`, file);

            if (error) {
              throw new Error('Error uploading image: ' + error.message);
            }

            const { data: { publicUrl } } = supabaseClient
              .storage
              .from('media')
              .getPublicUrl(\`public/\${fileName}\`);

            uploadedImages.push({ src: publicUrl, title: image.title || file.name });
          }
        }

        updatedFeaturedImages = uploadedImages;
      }

      const updatedValues = { ...values, featured_images: updatedFeaturedImages };
      dataProvider.create('posts', { data: updatedValues }).then(({ data }) => {
        notify('Post created successfully');
        redirect('list', 'posts');
      });
    } catch (error: any) {
      notify(\`Error: \${error.message}\`, { type: 'warning' });
    }
  };

  return (
    <Create>
      <SimpleForm onSubmit={handleSave}>
        <TextInput source="title" validate={[required()]} />
        <ImageInput source="featured_images" label="Featured Images" multiple>
          <ImageField source="src" title="title" />
        </ImageInput>
        <TextInput source="excerpt" validate={[required()]} multiline />
        <RichTextInput source="content" />
        <DateInput
          label="Publication date"
          source="publish_date"
          defaultValue={new Date()}
        />
      </SimpleForm>
    </Create>
  );
};
This form handles new post creation with image upload capability. When a user submits, images are uploaded to Supabase Storage and their public URLs are stored in the database.
Now, create the edit form at src/components/Admin/Post/PostEdit.tsx:
import {
  Edit,
  SimpleForm,
  TextInput,
  DateInput,
  required,
  ImageInput,
  ImageField,
  useNotify,
  useRedirect,
  useDataProvider,
  useGetRecordId,
  useGetOne,
} from "react-admin";
import { RichTextInput } from "ra-input-rich-text";
import { supabaseClient } from "../../../utils/supabase";

export const PostEdit = () => {
  const notify = useNotify();
  const redirect = useRedirect();
  const dataProvider = useDataProvider();
  const recordId = useGetRecordId();

  const { data: previousValues, isLoading } = useGetOne('posts', { id: recordId });

  const handleSave = async (values: any) => {
    try {
      let updatedFeaturedImages = values.featured_images || [];
      if (!Array.isArray(updatedFeaturedImages) && updatedFeaturedImages.rawFile) {
        updatedFeaturedImages = [updatedFeaturedImages];
      }

      if (updatedFeaturedImages && updatedFeaturedImages.length > 0) {
        const uploadedImages = [];

        for (const image of updatedFeaturedImages) {
          if (image.rawFile) {
            const file = image.rawFile;
            const fileName = \`\${file.name}-\${Date.now()}\`;
            const { data, error } = await supabaseClient
              .storage
              .from('media')
              .upload(\`public/\${fileName}\`, file);

            if (error) {
              throw new Error('Error uploading image: ' + error.message);
            }

            const { data: { publicUrl } } = supabaseClient
              .storage
              .from('media')
              .getPublicUrl(\`public/\${fileName}\`);

            uploadedImages.push({ src: publicUrl, title: image.title || file.name });
          } else {
            uploadedImages.push(image);
          }
        }

        updatedFeaturedImages = uploadedImages;
      }

      const updatedValues = { ...values, featured_images: updatedFeaturedImages };
      dataProvider.update('posts', {
        id: previousValues.id,
        data: updatedValues,
        previousData: previousValues,
      }).then(({ data }) => {
        notify('Post updated successfully');
        redirect('list', 'posts');
      });
    } catch (error: any) {
      notify(\`Error: \${error.message}\`, { type: 'warning' });
    }
  };

  if (isLoading) return null;

  return (
    <Edit>
      <SimpleForm onSubmit={handleSave}>
        <TextInput
          style={{ display: "none" }}
          disabled
          hidden
          label="Id"
          source="id"
        />
        <TextInput source="title" validate={required()} />
        <ImageInput source="featured_images">
          <ImageField source="src" title="title" />
        </ImageInput>
        <TextInput source="excerpt" validate={[required()]} multiline />
        <TextInput source="slug" validate={required()} />
        <TextInput source="unique_id" readOnly validate={required()} />
        <RichTextInput source="content" validate={required()} />
        <DateInput label="Publication date" source="publish_date" />
      </SimpleForm>
    </Edit>
  );
};
The edit form follows a similar pattern but also handles existing images, allowing you to replace or keep them during updates.
Displaying and Managing Posts#
Set up a list to display your posts. Create src/components/Admin/PostList.tsx:
import {
  List,
  Datagrid,
  TextField,
  DateField,
  ArrayField,
  SingleFieldList,
  ImageField,
} from "react-admin";
import PostUrl from "./PostUrl";

export const PostList = () => (
  <List>
    <Datagrid>
      <TextField source="title" />
      <PostUrl />
      <ArrayField source="featured_images" label="Featured Image">
        <SingleFieldList>
          <ImageField source="src" title="title" />
        </SingleFieldList>
      </ArrayField>
      <TextField source="excerpt" />
      <DateField source="publish_date" />
    </Datagrid>
  </List>
);
This list view displays all posts in a data table, showing key information like title, featured image, excerpt, and publication date.
Here's a helper component to generate the URL for each post based on its slug and unique ID. Create src/components/Admin/Post/PostUrl.tsx:
import { useRecordContext } from 'react-admin';

const PostUrl = (props: { label?: string }) => {
  const record = useRecordContext();
  if (!record || !record.slug || !record.unique_id) return null;
  const url = \`/\${record.slug}-\${record.unique_id}/\`;
  return (
    <a href={url} target="_blank" rel="noopener noreferrer">
      {props.label ?? url}
    </a>
  );
};

export default PostUrl;
5. Integrating the Admin Interface in Astro#
Finally, let's connect this admin interface to your Astro app.
Creating the Admin Route#
Create a new route at src/pages/admin/[...slug]/index.astro:
// src/pages/admin.astro: the frontmatter fences are left out here
import AdminApp from "../../../components/Admin/AdminApp";
// end of frontmatter
<AdminApp client:only="react" />
This route will render your admin interface whenever a user navigates to /admin. The dynamic catch-all route ensures React Router can handle internal navigation within the admin app.
Wrapping Up Part 3#
And that's it. You've successfully set up a powerful admin interface using Astro, React, and Tailwind CSS, all tied together with Supabase on the backend. This admin panel will give you full control over your blog's content, making it easy to create, edit, and manage posts with image uploads and rich text editing.
In Part 4, you'll focus on setting up the public-facing part of the blog using React and Tailwind, ensuring that your content looks as good as it functions. Your readers will see the posts you create here, styled beautifully and organized by category and date.
If you want the surrounding context, read Getting Started with Supabase for Blog Building and Building a Slick Blog with Supabase, React, Astro, and Cloudflare, Part 2: Fine-Tuning Your Database with Policies, Functions, and Triggers.
If you would rather have this done than do it: this is the kind of work behind our SaaS development and Cloudflare development.