Fine-tune your Supabase database with policies, functions, and triggers
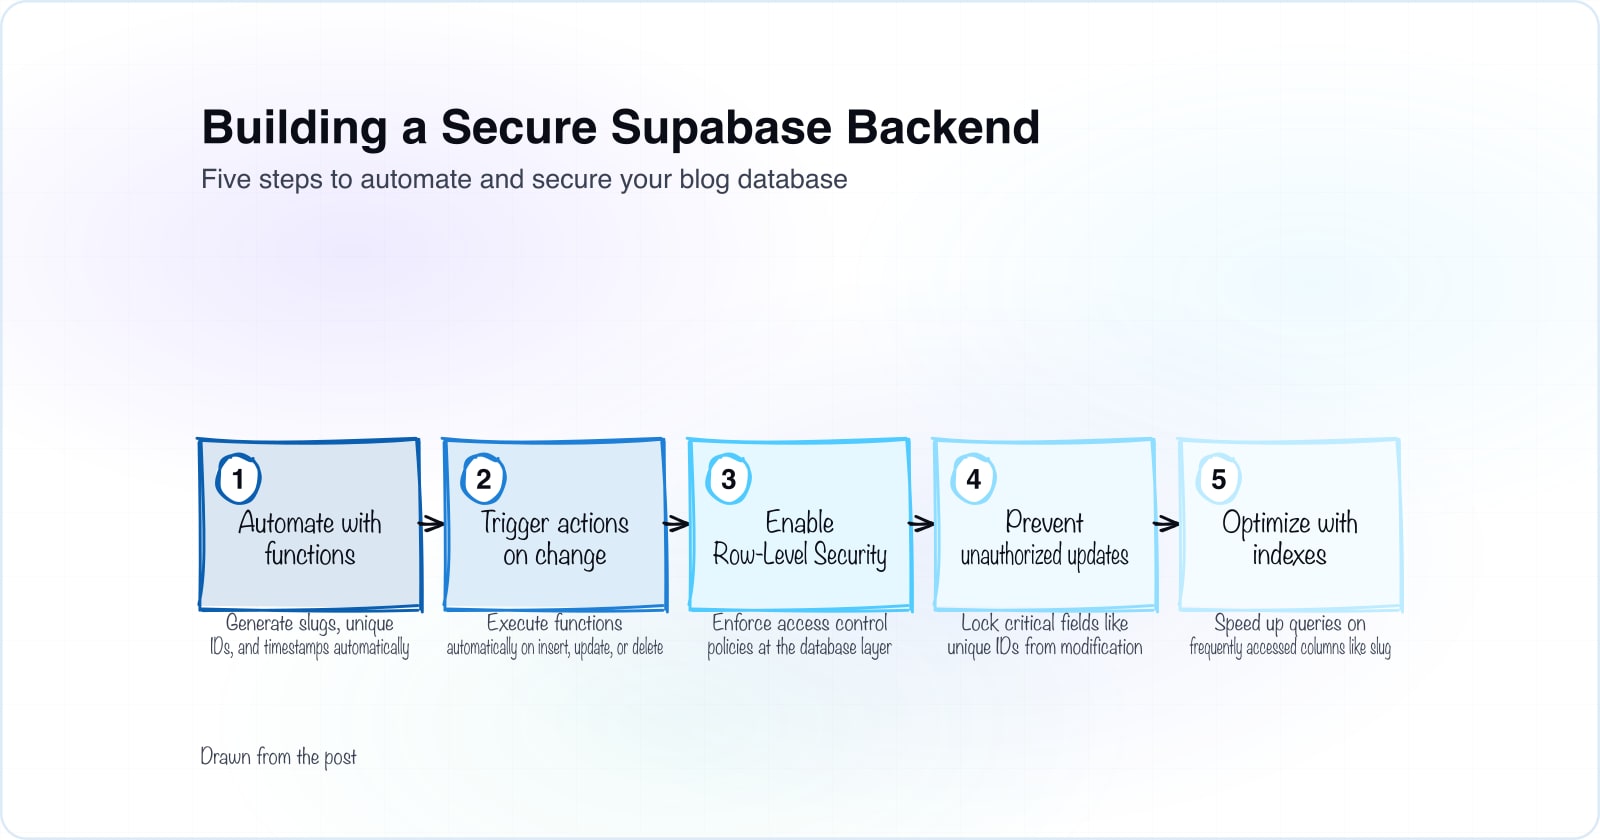
Welcome back to part 2 of your blog-building journey. You have built your UserProfile and Posts tables in Part 1. Now your backend needs intelligence. In this part, you will explore how to use Supabase functions, triggers, and Row-Level Security policies. You will automate tasks, secure your data, and ensure your blog backend runs like a well-oiled machine. Let's jump in and make your blog backend as smart and secure as possible.
Automating with functions and triggers#
Why do repetitive tasks manually when your database can handle them? Functions and triggers let you automate slug generation, unique ID creation, author assignment and timestamp management. This section walks you through each one and shows you how they work together.
Generating URL-friendly slugs#
Every post needs a clean, SEO-friendly URL. Instead of generating slugs manually in your application, create a database function that turns any title into a slug-ready string. The function converts titles to lowercase and removes accents and special characters. It replaces spaces with hyphens and trims leading and trailing hyphens.
-- Enable the unaccent extension (run this once in your database)
CREATE EXTENSION IF NOT EXISTS unaccent;

-- Function to generate a URL-friendly slug from a title
CREATE OR REPLACE FUNCTION generate_slug(title text)
RETURNS text AS $$
DECLARE
    slug text;
BEGIN
    -- Convert title to lower case, remove accents, special characters, and replace spaces with hyphens
    slug := regexp_replace(lower(unaccent(title)), '[^a-z0-9]+', '-', 'g');
    -- Remove leading and trailing hyphens
    slug := trim('-' FROM slug);
    RETURN slug;
END;
$$ LANGUAGE plpgsql;
With this function in place, you have a single source of truth for slug generation. Any client connecting to your database gets the same result, every time.
Automatically setting the slug with a trigger#
A trigger fires automatically whenever you insert or update a post. This trigger calls your slug function only when the slug is null or the title has changed. It ensures you never forget to generate one and never accidentally overwrite a slug.
CREATE OR REPLACE FUNCTION set_slug()
RETURNS TRIGGER AS $$
BEGIN
    -- Generate the slug only if it hasn't been provided or if the title changes
    IF NEW.slug IS NULL OR NEW.title IS DISTINCT FROM OLD.title THEN
        NEW.slug := generate_slug(NEW.title);
    END IF;
    RETURN NEW;
END;
$$ LANGUAGE plpgsql;

CREATE TRIGGER before_insert_update_set_slug
BEFORE INSERT OR UPDATE ON Posts
FOR EACH ROW
EXECUTE FUNCTION set_slug();
Now every time you insert or update a post, the slug is generated automatically. Your application code no longer needs to handle this logic.
Creating unique post IDs#
You need every post to have a unique identifier. This function generates a 10-character random string and checks whether it already exists in the Posts table. It keeps trying until it finds an ID nobody has used yet.
CREATE OR REPLACE FUNCTION generate_unique_id()
RETURNS text AS $$
DECLARE
    new_unique_id text;
    exists boolean;
BEGIN
    LOOP
        -- Generate a random string of 10 characters
        new_unique_id := substr(md5(random()::text), 1, 10);

        -- Check if this unique_id already exists in the Posts table
        SELECT EXISTS (SELECT 1 FROM Posts WHERE unique_id = new_unique_id) INTO exists;

        -- Exit the loop if the unique_id does not exist
        EXIT WHEN NOT exists;
    END LOOP;

    RETURN new_unique_id;
END;
$$ LANGUAGE plpgsql;
The function is designed to be collision-resistant while remaining fast. A 10-character string from an MD5 hash gives you enough entropy to avoid duplicates across millions of posts.
Automatically setting unique IDs and assigning authors#
Another trigger sets the unique_id and assigns the author based on the current authenticated user. This ensures every post knows who created it without your application having to pass that information explicitly.
CREATE OR REPLACE FUNCTION set_unique_id_on_insert()
RETURNS TRIGGER AS $$
BEGIN
    -- Generate the unique_id only if it is NULL (on insert)
    IF NEW.unique_id IS NULL THEN
        NEW.unique_id := generate_unique_id();
    END IF;

    -- Automatically assign the current user as the author
    IF NEW.author IS NULL THEN
        NEW.author := auth.uid();
    END IF;

    RETURN NEW;
END;
$$ LANGUAGE plpgsql;

CREATE TRIGGER before_insert_set_unique_id
BEFORE INSERT ON Posts
FOR EACH ROW
EXECUTE FUNCTION set_unique_id_on_insert();
The trigger assigns the current user as author via auth.uid(), a Supabase function that returns the logged-in user's ID. This is both secure and automatic.
Managing timestamps and soft deletes#
Your posts table has created_at, updated_at and deleted_at columns. You want created_at set once and never changed. You want updated_at updated on every change and deleted_at set only when a post is deleted. Triggers handle all three automatically.
Update the updated_at timestamp whenever a post changes:
CREATE OR REPLACE FUNCTION update_updated_at_column()
RETURNS TRIGGER AS $$
BEGIN
  NEW.updated_at = now(); -- Sets the updated_at field to the current timestamp
  RETURN NEW;
END;
$$ LANGUAGE plpgsql;

CREATE TRIGGER update_posts_updated_at
BEFORE UPDATE ON Posts
FOR EACH ROW
EXECUTE FUNCTION update_updated_at_column();
Soft deletes mark posts as deleted without removing them from the database. This preserves history and lets you recover deleted posts:
CREATE OR REPLACE FUNCTION soft_delete_post()
RETURNS TRIGGER AS $$
BEGIN
  NEW.deleted_at = now(); -- Sets the deleted_at field to the current timestamp
  RETURN NEW;
END;
$$ LANGUAGE plpgsql;

CREATE TRIGGER set_deleted_at
BEFORE DELETE ON Posts
FOR EACH ROW
EXECUTE FUNCTION soft_delete_post();
With soft deletes, you can query only active posts (where deleted_at is null) without losing deleted content.
Securing your data with Row-Level Security policies#
Your database now has useful automation. Next, make sure your data is secure. Row-Level Security policies control who can insert, update, delete, or view posts. Policies work at the database layer, so they apply no matter how the database is accessed.
Enabling RLS#
First, enable RLS on your tables. This tells Supabase to check policies before allowing any operation:
ALTER TABLE UserProfile ENABLE ROW LEVEL SECURITY;
ALTER TABLE Posts ENABLE ROW LEVEL SECURITY;
Once RLS is enabled, no operation succeeds unless a policy permits it. Without policies, all operations are denied.
Creating policies#
Policies define the rules. Each policy specifies who can do what to which rows. You can write policies that check the authenticated user's ID and their role. They can also check the content of the row or anything else you can query.
-- User Profile selection
CREATE POLICY allow_selecting_user_profile ON UserProfile
FOR SELECT
USING (true);

-- Insert posts as authenticated user
CREATE POLICY insert_any_authenticated_user ON Posts
FOR INSERT
WITH CHECK (auth.uid() IS NOT NULL);

-- Update and delete own posts
CREATE POLICY update_own_posts ON Posts
FOR UPDATE
USING (auth.uid() = author);

CREATE POLICY delete_own_posts ON Posts
FOR DELETE
USING (auth.uid() = author);

-- View published posts
CREATE POLICY select_published_posts ON Posts
FOR SELECT
USING (
    auth.role() = 'authenticated' OR current_date >= publish_date
);
These policies together create a secure blog:
- Anyone can read UserProfile records (you might restrict this later)
- Only authenticated users can insert posts
- Authors can update or delete only their own posts
- Anyone can view published posts, but only authenticated users see drafts
The select_published_posts policy uses current_date to compare against publish_date, so scheduled posts stay hidden until their publication date arrives. No cron job required.
Preventing updates to unique IDs#
Once a post is created, its unique_id should never change. An ID might be embedded in URLs, links, or external references, so allowing changes creates broken references. Create a function that raises an exception if someone tries to update the unique_id, then attach it with a trigger.
CREATE OR REPLACE FUNCTION prevent_unique_id_update()
RETURNS TRIGGER AS $$
BEGIN
    -- Prevent the unique_id from being updated after creation
    IF NEW.unique_id IS DISTINCT FROM OLD.unique_id THEN
        RAISE EXCEPTION 'Unique ID cannot be updated';
    END IF;
    RETURN NEW;
END;
$$ LANGUAGE plpgsql;

CREATE TRIGGER before_update_prevent_unique_id_change
BEFORE UPDATE ON Posts
FOR EACH ROW
EXECUTE FUNCTION prevent_unique_id_update();
Any attempt to modify the unique_id now fails with an exception. This enforces integrity at the database layer, preventing accidents and unauthorized changes.
Ensuring email consistency in user profiles#
When a new user profile is created, you want their email automatically copied from the auth.users table to the UserProfile table. This keeps emails consistent across your system and prevents mismatches between authentication and profile data.
CREATE OR REPLACE FUNCTION set_user_email()
RETURNS TRIGGER AS $$
BEGIN
    -- Set the email field based on the user_id from auth.users
    SELECT email INTO NEW.email FROM auth.users WHERE id = NEW.user_id;
    RETURN NEW;
END;
$$ LANGUAGE plpgsql;

CREATE TRIGGER before_insert_set_email
BEFORE INSERT ON UserProfile
FOR EACH ROW
EXECUTE FUNCTION set_user_email();
Every time a UserProfile is created, the email is automatically populated from auth.users. Your application never has to handle this manually.
Optimizing your database with indexes#
Your blog queries posts by slug constantly, especially when fetching individual posts. An index on the slug column speeds up these queries significantly, especially as your post count grows.
CREATE INDEX idx_slug ON Posts(slug);This index is especially important for SEO-friendly URLs. When you navigate to a post by its slug, the index makes that lookup fast. The speed improvement grows as your post count increases.
Wrapping up Part 2#
You have just built a production-ready blog backend. Your database now handles slug generation, unique ID creation, author assignment, timestamp management, and soft deletes automatically. Row-Level Security policies enforce access control at the database layer. Functions prevent accidental modifications to critical fields. Email consistency and database indexes round out a backend that is secure, efficient and maintainable.
In Part 3, you will shift gears and build the frontend using React, Astro, and Tailwind CSS. This will bring all this backend goodness to life. Your backend is locked and loaded. Time to make it beautiful.
If you want the surrounding context, read Getting Started with Supabase for Blog Building and Building a Slick Blog with Supabase, React, Astro, and Cloudflare, Part 3: Setting Up Your Admin Interface.
If you would rather have this done than do it: this is the kind of work behind our SaaS development and security and compliance work.